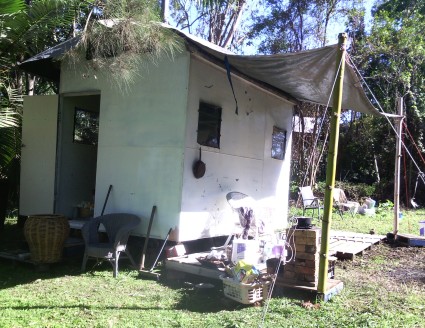
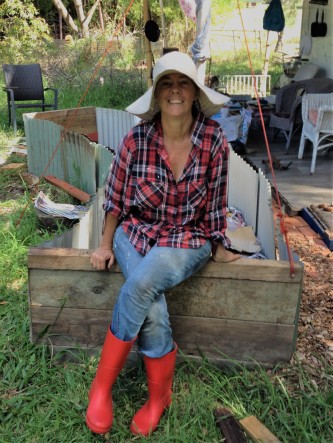
I am living in my friend’s backyard in town. I call it ‘Kim’s farm’.
People often ask about the arrangement Kim and I have made.
There is no formal ‘arrangement’ between us. We simply agreed it was a good move for us both for different reasons. I needed a place to park my wagon, grow food and have some good company. Kim wanted company too, as well as someone to help take care of the yard and grow a garden. Kim didn’t know much about growing food and I didn’t have a suitable place for my wagon following last year’s massive flood.
I am so grateful to Kim for having me around and I hope I have been a valuable asset in my time here. It’s certainly been lovely for me to have a blank canvas to play with – gardening is where my creativity blossoms.
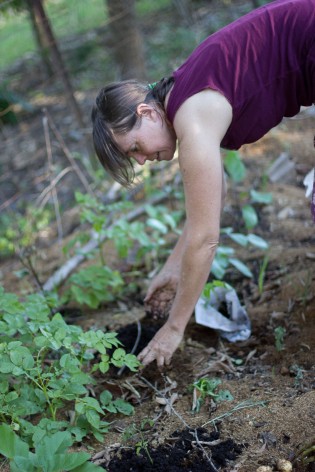
The garden beds, although slow going because of my grieving process during this time and the regular need to flee town for a fix of country vibes, are proving to be peachy.
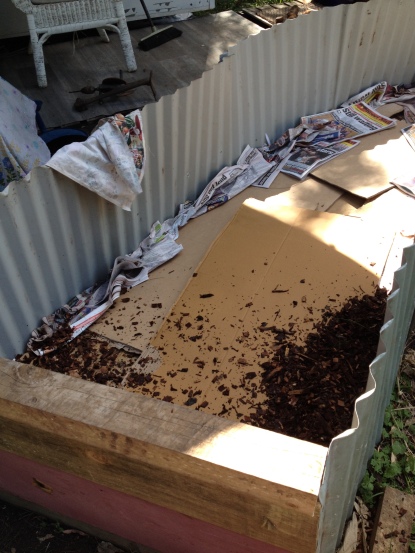
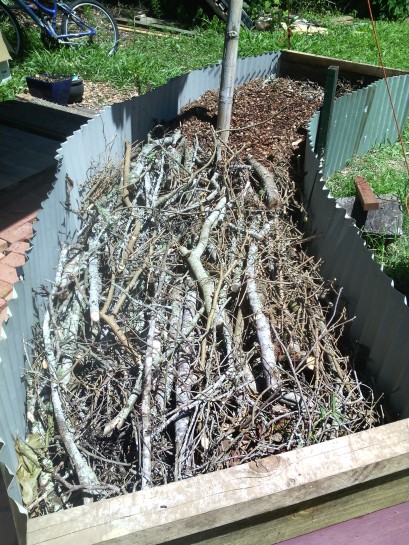
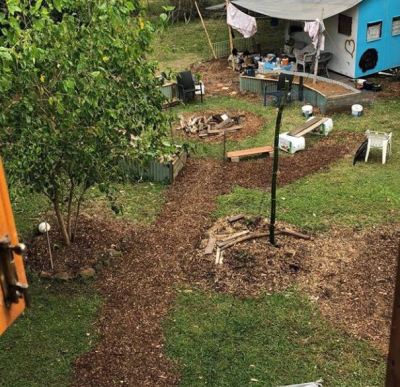
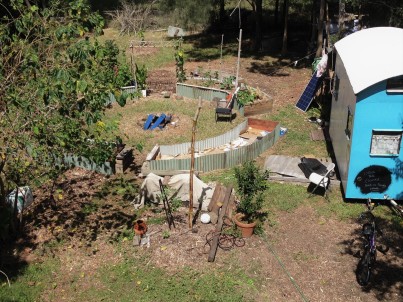
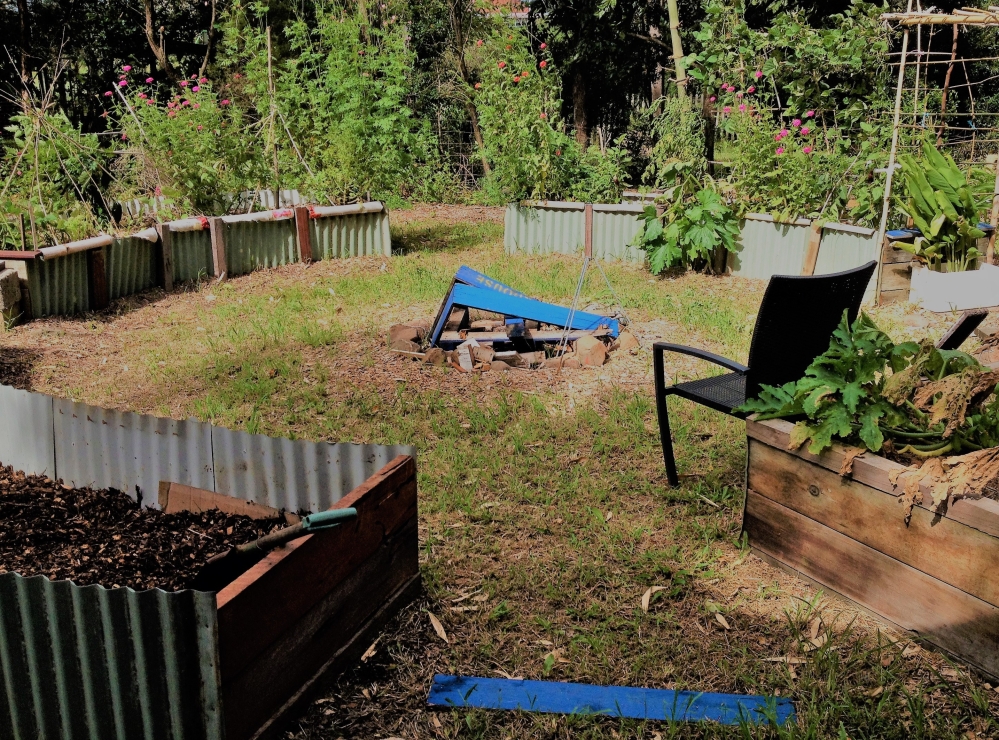
The choice of hugelkultur was based on the need to raise the garden beds quite high to allow smaller floods to leave them untouched. Also, the soil here is possibly slightly contaminated and is heavy and boggy at times.
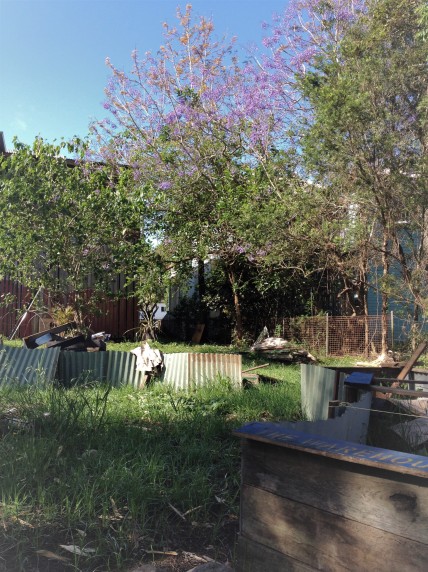
The placement, in a yard surrounded by trees, was dictated by access to sunlight (I’m still not sure if there’ll be enough winter sun) and Kim’s eagerness for a fire pit.
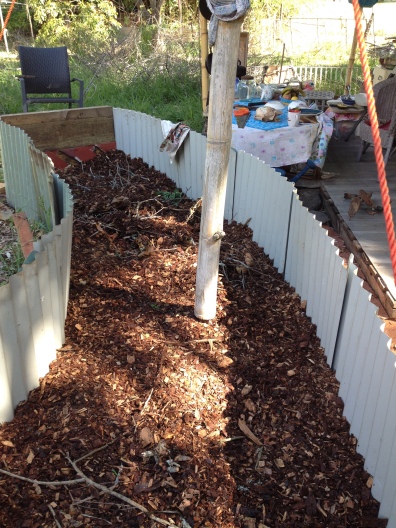
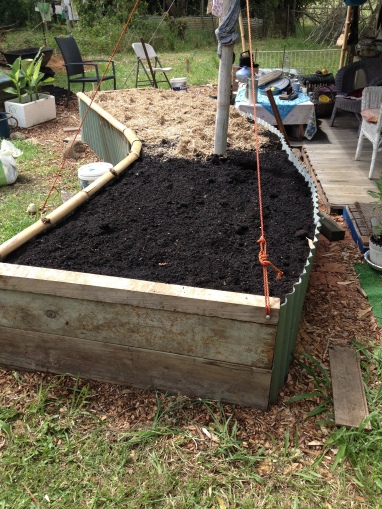
With some resourceful innovation, we came up with a circle of raised beds around a central fire pit using mostly locally-sourced, second-hand and waste materials.
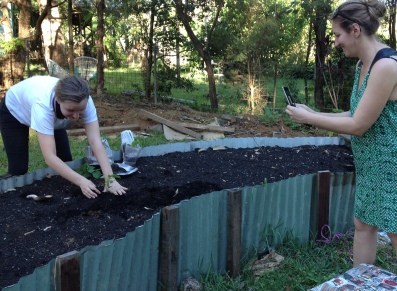
This is a photographic timeline of the progression of the yard to date:
- THE PROCESS:


Conclusions:
It’s all an experiment so I observe with interest.
I’ve noticed the soil levels drop about 10 cms since planting started in the first two beds. They’ll need topping up with compost soon. The third bed is better because I made sure the bed was packed really well.
I’ve never used this kind of system before. The beds haven’t been left to settle before planting so I expect some repercussions. We’re getting some food out of them but maybe there’ll be some losses in the first season or two as the system matures.
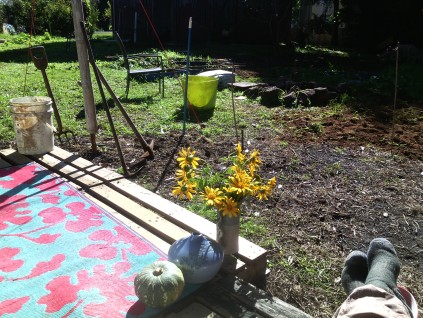
So far we’ve eaten some cucumbers, loads of beans, a bit of parsley, chives, eggplant, tomatoes, zucchini, basil, zinnias and capsicum from the first three beds (actually that’s pretty much all from the first two).
There’s lots of winter stuff going in over the next few weeks to fill all the gaps. By late winter I expect the garden beds will be looking great as long as we don’t get a flood that over-tops the beds. We are currently in the middle of flood season.
Kim’s one request, the fire pit, is delightful. We need to use it more often, and coming into winter, I’m confident we will. Is burning wood unnecessarily a low-impact choice though?
High-impact fossil fuel use in the making of the garden has me concerned too. We have used fuel in vehicles, and there were fossil fuels used in the making of the compost, the chipping of the wood, the cutting down of the old wattle, the delivery of the second-hand corrugated iron to our place and more. Using materials that have had a previous life (i.e. not created specifically for us), is OK in my world, but not this extra production of carbon emissions from direct fossil fuel use.
The only alternative, as far as I can see, would have been to develop the garden a lot more slowly using only the ingredients available within biking distance of us. Still possible, but the time pressure to produce food and get the yard sorted has trumped that option in this case. Next time maybe……

Thank you for your inspiring story! Love to hear more.
LikeLike
No worries. Let me know if there’s anything in particular you’d like to know more about. Cheers.
LikeLike
I’ve been back to this website a few times looking for updates on your progress since I saw you lifestyle choice featured on the ABC’s website and listened to a podcast featuring you being interviewed. I’ve been reading with interest. Congratulations. You inspire me. I feel I need to move from the crazy stream I’m in, but I somehow can’t find the courage to do what needs to be done yet.
LikeLike
Haven’t posted anything for a while, Craig. Life is a bit hectic atm. Also, not sure what to write about….that people would find particularly interesting. This life to me feels pretty mundane by now (after three years) as you can imagine so I sometimes find it hard to work out what to tell people about. Thanks for following though and for you comment. 🙂
LikeLike
These are fantastic Jo. Love them and yes to the soul searching. Yes to slower and bike local but you know you saved all those cuttings and chirpings from landfill so there is that. They say methane is 200-400% worse than Co2 in it’s heating effects so I’m not sure of the math but at a guess you and we all are still ahead. Also keep in mind growing food in on’s back yard is actively saving car trips too. Over the lifetime of these beds how many trips to the market wont be taken? I’m guessing you’re way way in front.
Keep up all the beautiful work. You’re such an inspiration.
LikeLike
Nice thought, Dingo Dreams. Thanks.
LikeLiked by 1 person
One thing, I’ve been experimenting with having in bed worm farm to naturally and continuously nourish the earth within. I did it with my barrels via a perforated pipe that I prime with good load of worm rich castings and then just food scraps. Pop a lid on top to stop possums, crows and magpies making a mess and by the look of my plantings it’s working a treat. I was thinking that would also work for you as with all that wood in there it is a lot of carbon that needs a lot of nitrogen to break down. I know you put in lots of pee but that is a quick hit. I thinks the worms are more of a slow release mechanism…just thinking aloud. Not sure how you would construct something coverable for the worms maybe a sturdy wooden crate with lots of holes drilled into it? I am thinking of using/creating a big pottery vessel with holes built in for such a purpose. Something like the vessels used to make huge batches of sourkrout. But it is just a pipe dream at the moment. All the best. Miro
LikeLike
I love that idea! And it will help Kim get rid of her food scraps in a better way than we’re currently doing. Although I wonder if the possums and neighbouring dogs would still smell it and damage the beds trying to get at it?
LikeLiked by 1 person
I have had the odd possum get in mine but I am pretty sure that was because I did overfilled the tube and could not /did not put the lid on properly. I have been mindful of that and it has not reoccurred of late. I think the key is to not allow them to develop that habit in the first place. They are smart and if they figure out your bin it will be very hard to beat them as they will just try and try harder.
LikeLiked by 1 person
I just had an idea, how about a couple of very large terracotta pots placed mouth to mouth. Carefully drill as many 1/2″ holes as possible in the bottom one and then mortar them together. Scrape or drill out a large 4″ hole in the top of top one and use a inverted saucer as a lid. Burry the lot carefully and you are set. Nice natural materials. Hmmm now what do I have to barter for a pair of these…I wonder? If you find a very large one you could just leave the bottom open and not bother with drilling the side holes .
LikeLike
Much easier for me to get hold of some pvc pipe with a large diameter….and easier to deal with.
LikeLiked by 1 person
Yeah that is what I did too but there is the plastic issue with drilling it and the shards or cuttings being… well.. microplastics and so on. So, trying to get away from that and so far clay pipe or two terracotta pots mouth to mouth or if really big just mouth down would be close to perfect but yeah as they say start with what you have and where you are… All the best 😀
LikeLike
Or if you can score an old tin oil or detergent tin from a food establishment and use a can opener to open the bottom and top might work for a few years and by then it may be a good time to set up another one somewhere else anyway. That or an galvanised old school bucket with a bottom cut out and a terracotta saucer for a lid? Being galvanised it will last for a very long time and it is big enough that a few will hold the scraps from two homes. Am sure many heads will come up with a great solution…. 🙂
LikeLike
Old watering can? Many get chucked out when the nozzle gets clogged up and they have the perfect shape. Cut the handles and the long pipe off and drill many holes later would also be a good reuse of materials.
LikeLike
One thing Jo, I have read that the wood chips can be spiked with fungi which then populates the bed and lives in symbiotic relationship with the root systems of the plants exchanging nutrients and breaking down the wood fibres. They (fungi) can also sequester many pollutants and even oils and heavy metals. There is a whole movement studying these aspects of them. I get so excited at this. Who would have thought, whole forests and indeed ecosystems have a rich alive internet caring for each other and communicating. Nature is just incredible.
LikeLike
and this biointernet is …. a gift based economy 😀 I read about it in a book The Secret Life of Trees (https://www.brainpickings.org/2016/09/26/the-hidden-life-of-trees-peter-wohlleben/) By the way, the fungi sequestering toxins is called mycro-remediation …. https://fungiforthepeople.org/mushroom-info/myco-remediation/ there is quite a bit on it in Permaculture studies and of late science at large has been looking into it as a way to get out of the very sad state we are leaving much of this planet. Still, at least that would be using natural methods and as such I do hope people once again start to look to and respect nature.
LikeLiked by 1 person
I echo the idea of using an old tin bucket (20-litre, say) with holes drilled in the side. Bury in the middle of the raised bed, and turf in any weeds, and other bits of greenery or vegetable waste, together with a handful of worms found elsewhere in the garden. Earthworms will do (i.e. red wrigglers are not obligatory). The worms enter and exit the tin bucket freely. I have a lit covering the bucket, weighed down with a rock. My raised bed with the worm bucket has lovely, friable soil three years later, and all manner of vegetables grow much better in that bed than any other. You mentioned floods. Which part of the world do you live in?
LikeLiked by 1 person
Hi Alison. Yes, the worm tower in the garden bed is something I haven’t tried yet but plan to – kinda’ waiting for the right bin to turn up (second-hand and free, of course). I live in Lismore, NSW. Floods used to be a yearly thing here but they are getting rarer and possibly worse when they do come.
LikeLike
I live in Portugal, although I have family in Brisbane – close enough to you, I guess. I heartily support the principle of free, second-hand finds – the best kind!
LikeLiked by 1 person